The ‘Booking’ interface is used to maintain record about the booking details of a project unit. Through the 'Booking’ interface, user is be able to record Unit Information (Unit Type, Typology, Floor, Floor), Area Information (Super Built-up, Built-up, Carpet, Land/UDS area), Revenue Heads details (Unit cost, Land cost, Vehicle Parking cost, Extra Charges cost), Payment Plan, Broker information, Discount Information, Basic Rate, Basic Price, Tax details, Gross Price and many more.
Main Info
Unit Info
Business Unit: Select business unit
Financial Year: It gets populated, however user can select another as per requirement
Document Type: It gets populated, however user can select another as per requirement
Document Date: It shows as on date by default. User can set another date.
Document No: It is generated after the entry saved
Project Hierarchy: Select project hierarchy (Data comes from Setup > Project > Project Hierarchy)
Application: Select application (Data comes from Transaction > Booking > Application Details)
Unit: Select unit (Data comes from Setup > Unit > Unit)
On selecting unit, customer and currency get populated
Unit Details
On selection of 'Unit', Unit Type, Typology and Floor get populated
Sales Person: Select sales person (Data comes from SFA > Setup > Sales team > Sales person)
On selection of Sales person details will gets populated
Relationship Officer: The Relationship Officer name can be entered
Payment Plan: Select payment plan (Data comes from Setup > Payment Plan > Payment Plan)
Price List: Select price list (Data comes from Transaction > Pricing > Price List)
Remarks: Enter remarks if required
Market Value: Market value of the unit can be entered here
Area Info
Area Info shows super built up, built up, carpet, land area of unit
Revenue Heads Info
Revenue Heads Info shows revenue head details. New row can be added to record new revenue head details.
Payment Plan
Payment plan details are shown here. New row can be added to record new payment plan.
Payment Plan can be modified also. Clicking on any Payment Plan, the following window appears where modification can be done. After modification click 'Save'.
Other Charges
Details of other charges are shown here.
Clicking on CGST or SGST row will open GST information i.e. GSTIN, GST Code, GST nature and classification
Broker Info
Brokerage details are to be recorded here.
Broker Type: Select broker type
Click '+ Add New Row' to enter broker related information
Broker Name: Enter broker name
Brokerage Template: Select brokerage template
Brokerage Release: Select brokerage release
MOU No.: Enter MOU number
MOU Date: It gets populated
Brokerage: Brokerage percentage gets populated
Assessable Amt: Assessable amount gets populated
Discount: Enter discount if any
Additional Amt: Enter additional amount if any
Net Amt.: Enter net amount
Click 'Save'
Commitments
Extra Info: User has option to select type of customer here.
Commitments: Click '+Add New Row' to record commitments information
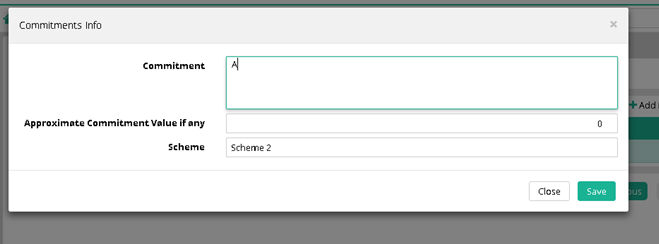
Commitment: Enter commitment
Approximate Commitment Value if any: Enter approximate commitment value if any
Scheme: Select scheme (Data comes from Setup > Other Charges or Scheme > Scheme)
Click 'Save'.
Submit and save the booking entry.
Create/Edit Agreement, Permission to Mortgage and Possession entry from Booking Advance Search.
Click
on  icon.
icon.
Click on PTM/Agreement/Possession as per your requirement
On clicking of PTM/Agreement/Possession the system will open the respective entry screen to make new entry against the respective booking or it will open the existing PTM/Agreement/Possession entry to edit.
Step 8- Enter the details as per requirement to make the PTM/Agreement/Possession entry and click on Submit to Save the entry.
Notes:
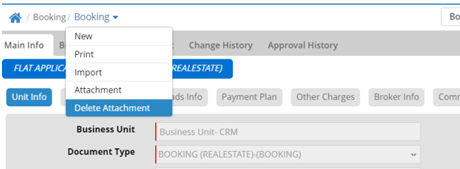
1. Users will be able to delete any attachment in Booking interface find mode
Step 1: Go to Booking > Booking > Booking Advance Search
Step 2: Find any booking entry which is having attachment
Step 3: Click on Delete Attachment option
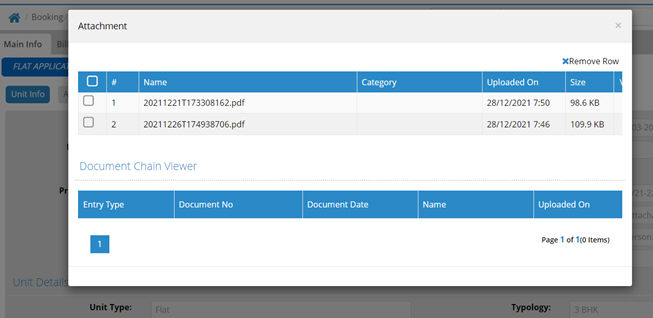
Step 4: One popup will open for Delete Attachment, now user requires to select the respective attachment and need to click on Remove Row
2. WhatsApp Integration - Users will be able to send WhatsApp from Farvision for Booking
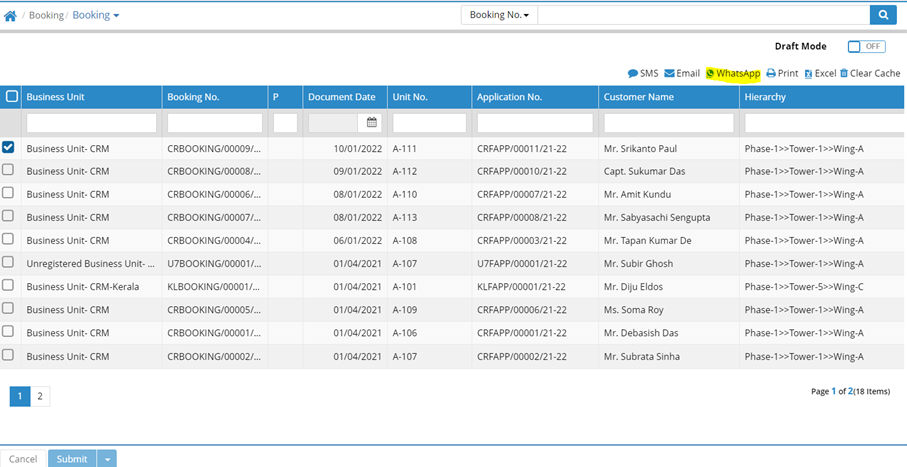
Step1: Go to Advance Search of Booking
Step2: Select any document number and click on WhatsApp icon, the 'Bulk WhatsApp' popup will open
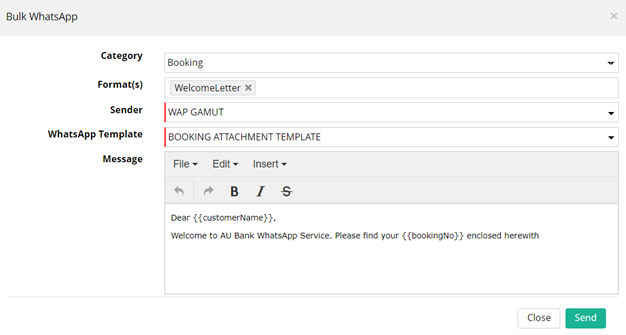
Step3: Select Sender Name, Template and then click on 'Send'
3. CRM Process Status Bar - Agreement Handover Date incorporated in CRM Process Status Bar > Agreement
Users will be able to see the Agreement Handover Date in Agreement tab of CRM Process status.
Step1: Go to Sales and Customer Care module’s home page
Step2: Go to Booking > Booking
Step3: Find any booking which is having Agreement entry
Step4: After finding the Booking entry just click on the “Unit Agreement” option under the process status bar.
Step5: Now users can see the Agreement process details along with the Agreement Handover Date.
4. CRM Process Status Bar - One new stage has been incorporated as Issue of NOC in CRM Process Status Bar
Now users will be able to view the new stage Issue of NOC (PTM entry) in CRM Process Status Bar.
Step1: Go to Loan > Permission to Mortgage
Step2: Make Permission to Mortgage Entry against any Booking
Step3: Go to Booking > Booking
Step4: Find the respective booking which is having Permission to Mortgage entry
Step5: After finding the Booking entry just check that the Issue of NOC stage is showing in CRM Process Status Bar
Step6: Clicks on the “Issue of NOC” option under the process status bar
Step7: Now users can see the Issue of NOC process details along with the NOC Handover Date and TPA/PTM Handover Date
5. Booking - One new column has been incorporated as “IsAmended” in Booking Advance Search
Now users will be able to view/filter the booking entries which are having Booking Amendment entry.
Step1: Go to Booking > Booking
Step2: Find any booking which is having Booking Amendment entry
Step3: Now user can see that the newly incorporated column IsAmended is showing Yes as the said booking is having Booking Amendment entry.
6. Booking- Facility incorporated for Schedule name update against the Schedule type (Booking, Allotment and Possession) at the time of New Booking entry.
Now users will be able to select the latest description of Booking, Allotment and Possession type Schedule during new Booking Entry.
Step 1: Go to Setup > Payment Plan > Schedule
Step 2: Find the Schedule type as Booking or Allotment or Possession

Step 3: Now Edit the Schedule master and update the Schedule’s Description as per requirement

Step 4: Go to Booking > Booking
Step 5: Select Business Unit, Financial Year, Document Type, Document Date, Project Hierarchy, Application number, Unit number, Payment Plan, Price List.
Step 6: Click on Next button
Step 7: Click on Next button in the Area Info Tab
Step 8: Enter Revenue Head-wise rate and click on Next button in Revenue Head Info Tab
Step 9: Now in the Payment Plan Tab click on the Schedule name namely “Booking”
Step 10: Now click on the drop-down option “Schedule” in the Payment Plan Modification popup and check that the latest Schedule Description which was set against the Booking schedule is showing here to select
Step 11: Select the latest Schedule Description from the drop-down option of Schedule
Step 12: Click on Save button.
Step 13: Now check that the Schedule Description has been updated as per the latest description selected
Step 14: Click on Next button.
Step 15: Click on Next in Other Charges Tab
Step 16: Click on Next button in Broker Info Tab
Step 17: Click on Finish in Commitments Tab’
Step 18: Click on Submit button to Save the booking entry
Step 19: Check the Booking Annexure print where you can see the latest schedule description Booking Schedule
7. Option incorporated to Create/Edit Agreement, Permission to Mortgage and Possession entry from Booking Advance Search.
Now users will be able to Create/Edit Agreement, Permission to Mortgage and Possession entry from the Booking Advance Search.
Click on  icon.
icon.
Here user will get three options PTM, Agreement and Possession.
Click on PTM/Agreement/Possession as per requirement.
On clicking of PTM/Agreement/Possession the system will open the respective entry screen to make new entry against the respective booking or it will open the existing PTM/Agreement/Possession entry to edit.
Enter the details as per requirement to make the PTM/Agreement/Possession entry and click on Submit to Save the entry.
Sample entry screens for Booking Advance Search

Permission to Mortgage
Agreement
Possession
View Reports of the Booking section
© Gamut Infosystems Limited