Activity
Before creating activity, user needs to record the following information
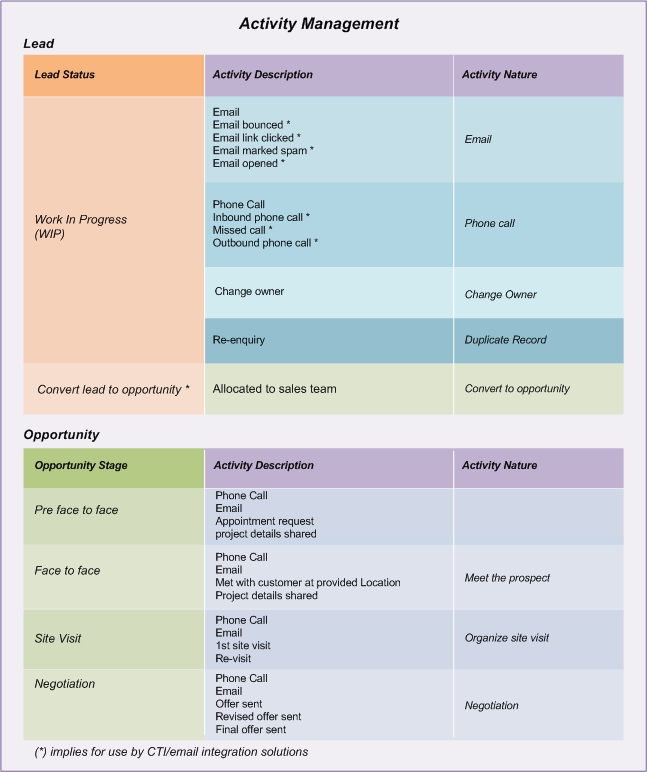
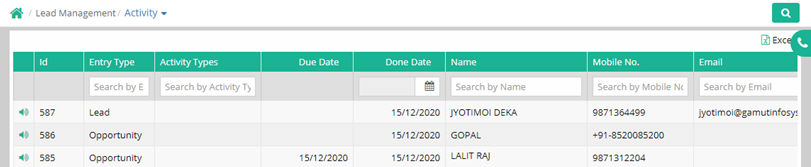
Different sales activities based on entry types can be created through this interface.
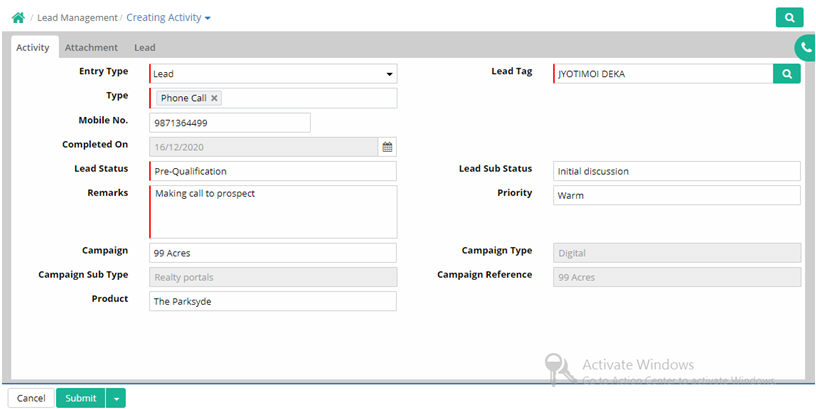
Entry Type: Select entry type among options Lead, Opportunity, Contact and Account
Lead/Opportunity/Contact/Account Tag: Select as per entry type selected. All these are tagged with their main entry location. (Data comes from Setup > Lead Management > Lead/Opportunity/Contact/Account)
Type: Select type of activity (Data comes from Setup > Qualification Categorisation > Lead Sub Status)
Mobile No.: Enter mobile number of the lead/opportunity/contact/account as per entry type selected. Mobile No will also appear with tagged name if exists.
Due Date: Enter due date of the activity
Completed On: Enter date on which the activity is done
Lead Status/Opportunity Stage: Select Lead Status.(Data comes from Setup > Qualification Categorisation > Lead Status). If entry type is Opportunity then Opportunity Stage is to be selected.

Lead Sub Status/Opportunity Sub Stage: Select sub status of lead if any (Data comes from Setup > Qualification Categorisation > Lead Sub Status). If entry type is Opportunity then Opportunity Sub Stage is to be selected.
Priority: Select the priority as applicable.(Data comes from Setup > Qualification Categorisation> Priority)
Remarks: Put remarks on activity
Campaign: Choose campaign. (Record comes from Lead Management > Campaign)
Campaign Type: Campaign Type gets displayed as mapped with campaign
Campaign Sub Type: Campaign Sub Type gets displayed as mapped with campaign
Campaign Reference: Campaign Reference gets displayed as mapped with campaign
Product: Select name of the product. (Data comes from Setup > Product > Product)
For any file attachment with data use Attachment tab and then use “Add New Row” Button.
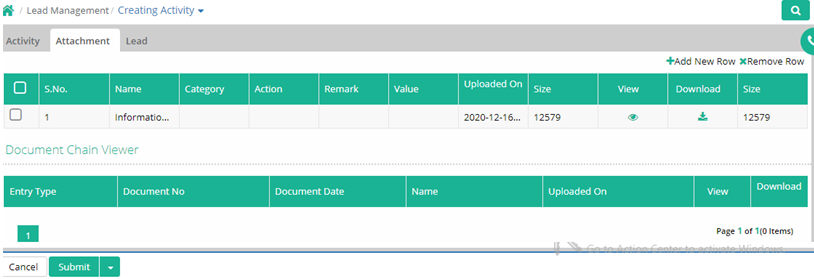
Click 'Submit' and then 'Save and Close' to save the activity.
Submitted activity displayed in tables.
Activity Import
Activity can be imported using a proper Activity import template. In this process users have to download the Activity template from the given import menu. Then this template has to be filled with proper information. Then upload this template and validate for any error. If it shows success after validation then import this template data in the system using the import button.

| Type | Id | Owner | Activity Type | Due Date | Done Date | Phone Call | Lead Status | Lead Sub Status | Opportunity Stage | Opportunity Sub Stage | Remarks | Priority | |
| O | 77278 |
John Smith | Site Visit | 7/4/2019 |
Re Site Visit | Site visit has been done. | |||||||
| O | 77263 |
Anand Joseph | Personal Meeting | 7/2/2019 |
Lost | Not showing targeted offers to the right people | Client not interested now. | ||||||
| L | 458323 |
Jade Albert | Phone Call | 7/1/2019 |
Work in Progress | Meeting with client done. | |||||||
| L | 458326 |
Jahirul Islam | 7/4/2019 |
Non-Workable | Location is not suitable. | Location is not suitable. | |||||||
© Gamut Infosystems Limited