Non Stores Purchase
When purchases are made but not recorded as inventory, they are handled through the ‘Non-Stores Purchase’ interface. This means that the liabilities are recorded without affecting the inventory records.
Using the ‘Non-Stores Purchase’ interface is important because it allows the company to accurately record liabilities for service purchases.
The ‘Non-Stores Purchase’ interface should be used whenever purchases are made that do not need to be recorded as inventory. This interface helps in managing such transactions efficiently.
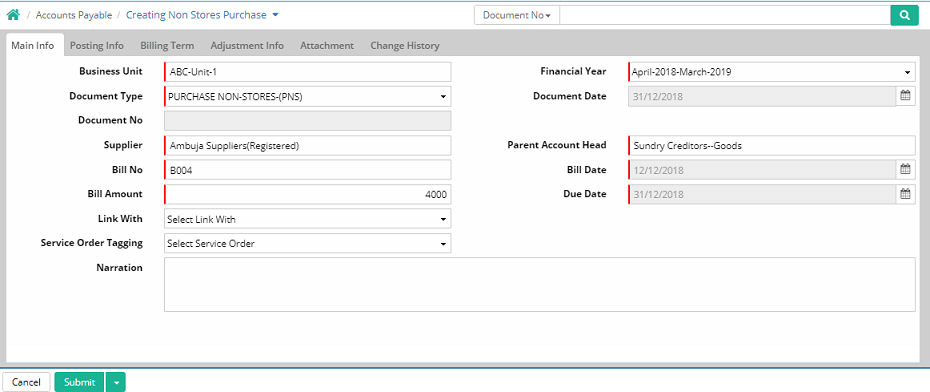
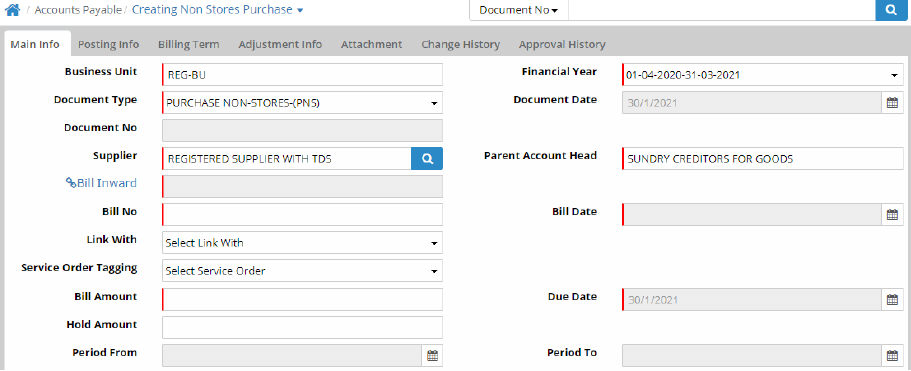
Main Info
The ‘Main Info’ tab will allow user to record information like document number, supplier’s name, bill number, bill amount, date, due date, link with, service order tagging and narration.
Business Unit: Select business unit.
As soon as the business unit is selected the financial year, document type and document date will appear
Document No: This is generated after saving the entry
Supplier: Select the name of the supplier
Bill No: Enter bill number
Bill Date: Select and enter bill date from calendar popup
Bill Amount: Enter bill amount
Due Date: Select and enter due date from calendar popup
Link With: The Link With field will allow user to choose any of the options including ‘Extra Charge - From GRN’, ‘Extra Charge - Direct’, 'Transporter Bill', 'Transportation Inward' and ‘Plant Maintenance’. The ‘Extra Charge - From GRN’ option will help you to link with the GRN.
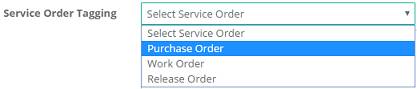
Service Order Tagging: Select service order from drop down list
Narration: Enter narration if any
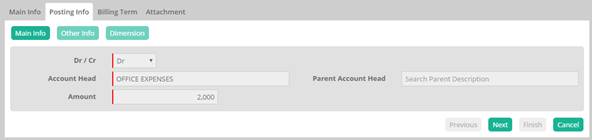
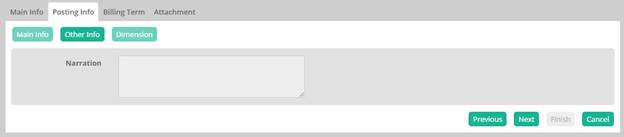
Posting Info
Click ‘Add New Row’ to add posting information. Under ‘Posting Info’ tab there are three sub sections namely ‘Main Info’, ‘Other Info’ and ‘Dimension’.

Main Info: Select debit/credit from drop down list, select ‘Account Head’ and ‘Parent Account Head’, enter amount to be debited or credited and click ‘Next’.
Other Info: Enter narration and click ‘Next’.
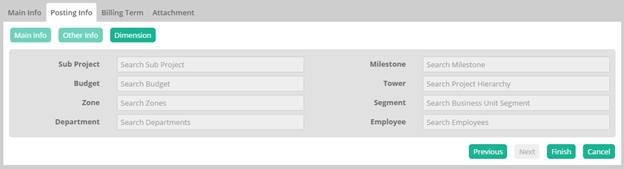
Dimension: Enter Sub Project, Milestone, Budget, Tower (Project Hierarchy), Zone, Segment (Business Unit Segment), Department, Employee and click Finish.
Posting head will be always expense type account head

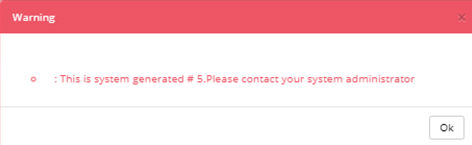
If user selects any supplier type ledger in posting info, then the following error message will come

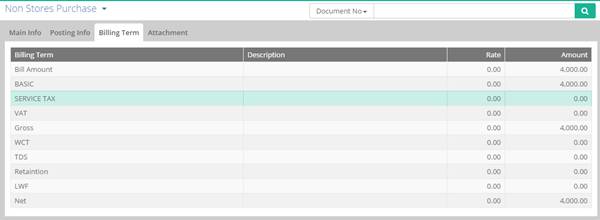
Billing Term
List of billing terms with descriptions, rates and amounts are displayed here.
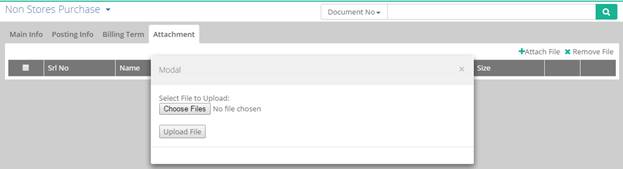
Attachment
Click ‘Attach File’. A popup window opens where user is able to select file to upload by clicking ‘Choose Files’ button to browse file and finally clicking on ‘Upload File’ button.
User is also able to remove the attachment by clicking ‘Remove File’.
Additional Features:
1. Bill inward option can be made mandatory in Non Store Purchase bill:
Steps to activate the bill inward mandatory in Non Stores Purchase:
Please click on Material & search the Entity NonStoresPurchase

Please click Edit & go to Properties

Click on Bill Inward option
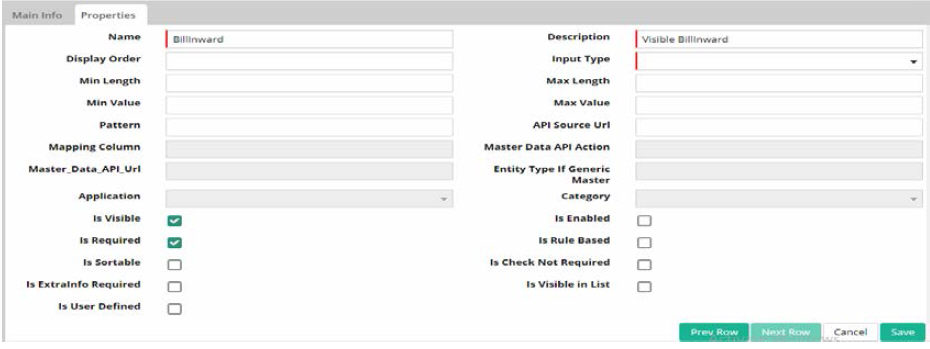
Please tick the ‘Is Required‘ option and then click Save.
Bill inward option in Non Stores Purchase bill is now mandatory.
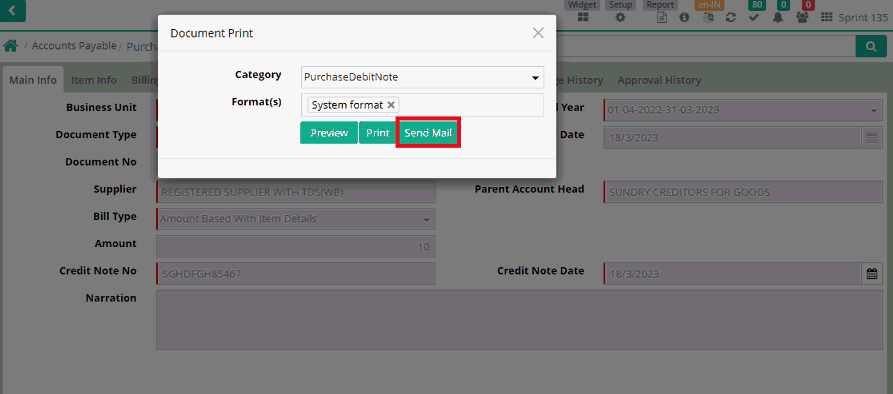
2. Sending Email from Non Stores Purchase
To send document through mail user is required to setup Email Template through Administration > Communicator > Email Template.
Sample Email Template
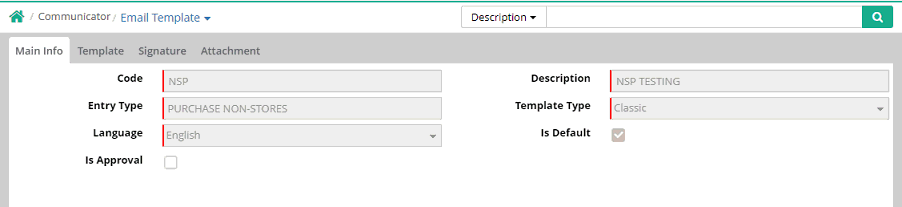
Entry type is to be selected as 'PURCHASE NON-STORES'
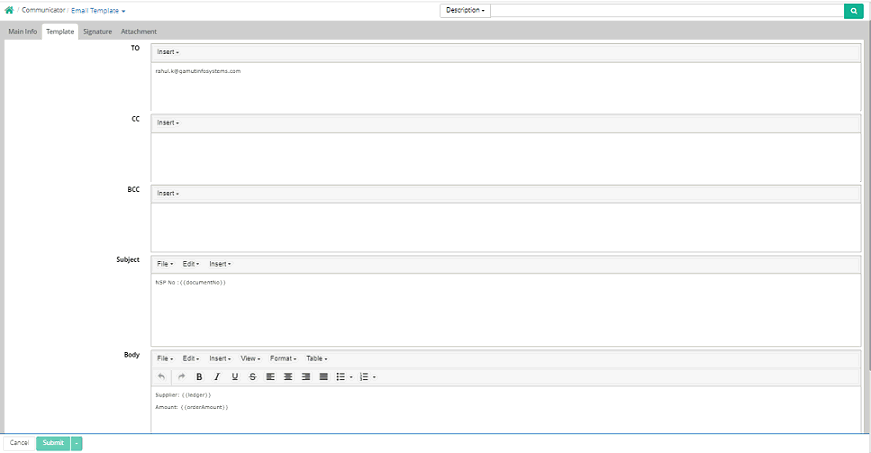
User can send Non Stores Purchase document through mail from Document Print option in Non Stores Purchase interface.
Reports: Following reports are available
1. Non Stores Purchase Register
2. Non Stores Purchase Posting Detail
3. Non Stores Purchase With Billing Term
© Gamut Infosystems Limited