![]() Tutorial: Creating
Employee Advance
Tutorial: Creating
Employee Advance
Advance payment can be given against salary and it has to be deducted against future salary. The deduction can be made in one or more installments. The deduction will start taking place from the month specified. Salary will be automatically deducted as per schedule defined and will reflect in the payslip. If Payment Requisition has been enabled then a payment request will be sent to the finance module. Advance can also be applied through Employee Self Service Portal and Farvision Pay Mobile Application. It is highly recommended that approvals be activated for advances which are made through payroll mobile app and employee portal.
Adjustments or variations in deduction amount or deduction schedule or waiver (in part or full) of advance amount are handled through the Adjustment screen.
Configurations of policies for giving advance can be done through Advance Setup
Advance policy can be mapped at Enterprise or Company Level.
Time period after which an employee is eligible for getting an advance.
Allow multiple advances at a time.
Set limit based on Monthly CTC, Monthly Gross or manual amount with ceiling percentage

Employee: Select the employee who requires advance against salary.
Deduction Head: By default, the deduction head which is created through Deduction Master will be displayed here. The deduction head Identification should always be Advance.
Advance Date: Select the date on which the advance is being applied for.
Deduction Month: Select the month from which the deduction against the advance will start. This can be any month for which salary has not been generated. If salary has been generated for the month, the deduction cannot start from that month. Example, advance date is 1 Sep, deduction month can be September or even August if the salary for August has not been generated.
Advance Type: Select the type of advance as Normal.
Deduction Type: Deduction can either be made in installments or as a lump sum amount.
Advance Amount: Enter the amount of advance being taken.
Balance Amount: Any deductions already made will be automatically adjusted and the balance amount against the advance is displayed here. If no amount has been deducted, it will show the full advance amount here.
No. of Installment: If installment has been selected, enter the number of installments in which the amount will be deducted.
Deduction Amount: In case deduction type is amount, the advance amount mentioned above is the deduction amount. In case the deduction type is installments, the advance amount is divided by the number of installments and displayed here. The remainder or balance of any amount left is deducted additionally after the installment amounts are paid.

Remarks: Enter remarks of advance if any
Close: This is auto closed when the entire advance amount has been deducted from payroll. This working is on the basis of the salary generation process, not on the payout of salary.
Payment Info: History of amount paid through salary deductions and balance amount is displayed here. Impact of variations in payment schedule or amount done through the Adjustment interface will also be displayed here. Only waivers given will be reflected with Payment type as Adjustment. More info is available in Adjustment.
In this example, an advance of Rs 20000 was taken in April, deduction started from salary of April. In June, no advance was deducted. From July the installment amount was increased to 4000. In September, waiver of Rs 8000 was given.

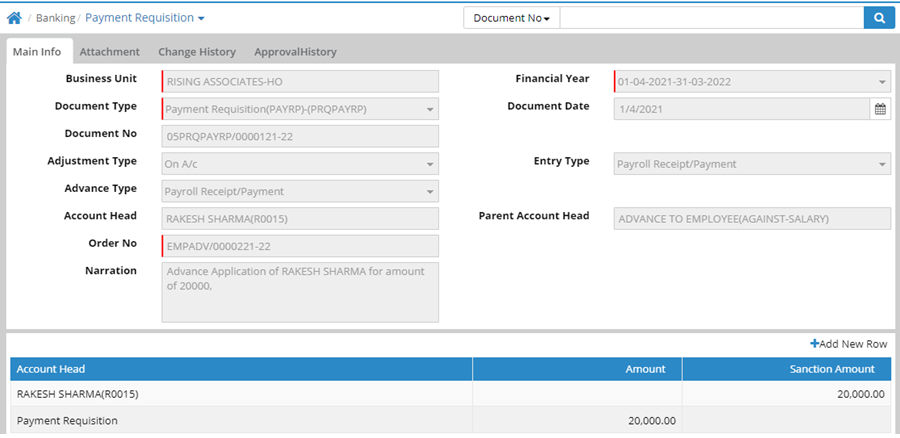
Payment Requisition for Employee Advance allows the advance amount to be sent to the Finance module as a request for payment. The request will be displayed in the PRQ Generation screen. If the Finance module is being used, this should be enabled. Payment Requisition for Employee Advance is enabled in the Payment Requisition Setup.
If it is enabled and the Finance module is not in use, then advance deduction entry will not be visible in the payslip or any other payroll interfaces until this requisition is processed through the Finance module.
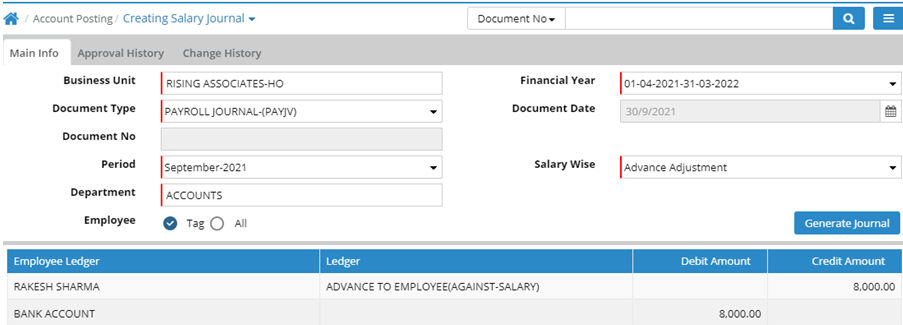
If there is a negative adjustment, for example in case of waivers, and Payment requisition for Employee Advance is enabled, then automatically a Salary Journal entry will be done which allows for the impact of waiver through Advance Adjustment to be given in Finance module. In case Payment Requisition for Employee Advance is not enabled then the waiver amount will not be visible in finance. The finance module will show payment receivable against advance from the employee and the payroll module will show no receivable against advance from the employee as it has been waived off.
PRQ generation screen


Advance Adjustment

Salary Journal

Posting: PRQ generation, Journal and Payment entries will always be posted in Salary Business Unit through Organisation Master.

Usage in Reports:
1. Advance Register

2. Pay Register

![]() Tutorial: Creating Employee Advance
Tutorial: Creating Employee Advance
© Gamut Infosystems Limited