![]() Tutorial: Creating Account Head Master
Tutorial: Creating Account Head Master
Account Head Master
Account head or ledger is essential for any accounting transaction.
Different account heads can be created through this interface. Each account head falls in specified account head group created through 'Group Master' interface.

Code: Enter account head code
Description: Enter account head description
Alternate Description: Provide alternate description (Optional)
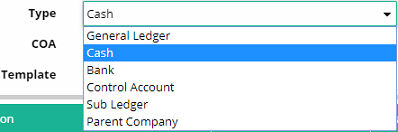
Type: Select account head type
· Group: Group selection needs to be done from Template Wise Group Tag. (In case of Sub Ledger group will be selected as per Control Account selection. Control Account Group will automatically be used for Sub Ledger)
Alternate Description: Enter alternate description if any
Parent Description: It shows parent description if exists
Discontinued: This box is selected if the account head is discontinued
Depending on account head types different entry descriptions required to be created as discussed below;
1. Account Head Type 'Bank'
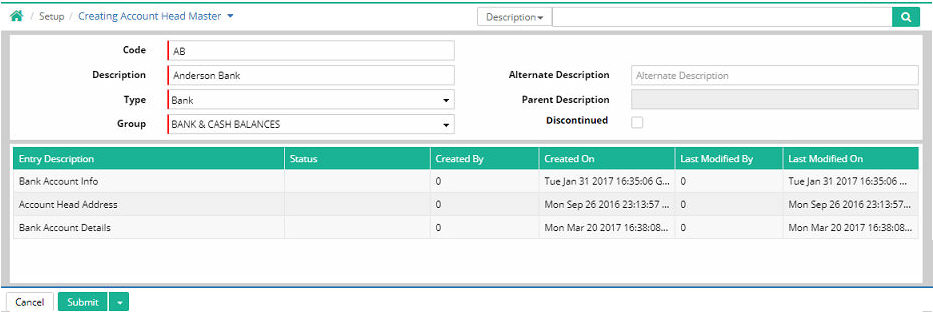
Bank Account Info, Account Head Address and Bank Account Details will have to be provided
A. Bank Account Info
Account No: Enter account number
Account Type: Select the type of account (Savings, Current etc.)
IFSC Code: Enter the IFSC code of the bank branch
Branch Code: Enter the bank branch code
Net Banking Id: Enter the net banking id
FCNR/FCBU Account: FCNR stands for Foreign Currency Non Resident and FCBU stands for Foreign Currency Banking Unit
Currency: If FCNR/FCBU option is selected then enter currency
Disallowed over draft: If overdraft is not allowed then select this option
Favourite Bank: If user considers this bank as Favourite Bank then this option is selected
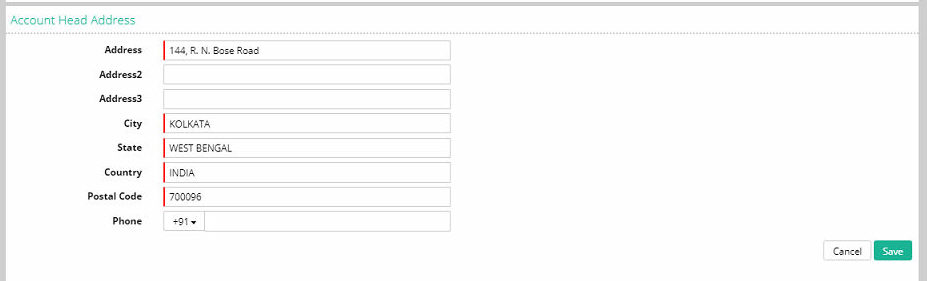
B. Account Head Address
Click ‘Add New Row’. It will expand the interface in lower portion to fill up the address details which includes the following
Copy Address: Address can be copied from parent company to child ledger. When user clicks on Copy Address Check Box then Account head address of child ledger will be copied from Parent account head address.
Note: If user creates Parent company type Ledger with account head address and also user wants to create a child ledger belongs to this parent company. After that when user opens the account head address tab of child ledger, there will be a new check box Copy Address has been added in account head address tab. When user clicks on Copy Address Check Box then Account head address of child ledger will be copied from Parent account head address.
If user wants to change or add the account head address of existing child ledger where address already exists, but user wants to change or add another one at that time when user clicks on copy address check box that time a pop up will be showing on the screen ‘Do you want to over write address?’. If user clicks on ‘Yes’ then the existing address will be replaced by the new address and if user clicks on ‘No’ then the new address will be added with the existing address.
Type: Enter address type. The two address types are Permanent and Correspondence
Address: Enter address
Country: Enter name of the country
State: It will be auto populated
City: It will be auto populated
Postal Code: Enter postal code
Effective From: Enter the date from when this address is effective.
Phone: Enter phone number
Is Primary: At least one of the addresses should be primary.
Click ‘Save’ button.
C. Bank Account Details
Click 'Add New Row'
Beneficiary Bank A/C No: Enter beneficiary bank account number
Beneficiary Bank A/C Name: Enter beneficiary bank account name
IFSC/IBAN No.: Enter IFSC or IBAN number as required
Bank Address: Enter bank address
Swift Code: Provide Swift code if any
Account Type: Enter Account Type
Beneficiary Bank Name: Enter the beneficiary bank name
Branch Code: Enter the branch code
IsDefault: This is selected if the bank account detail is taken as default
Click 'Save' button.
D. Contact Person Info
Type: Select the type as permanent or temporary
Name: Enter name of the contact person
Designation/Profile: Enter the designation of the contact person
Email: Enter the email address of the contact person
Owner Name: Name of the owner can be entered
Category: Select the category among Billing, Owner, Management and FV Payment Portal
Phone: Enter the phone number of the contact person
Mobile: Enter the mobile number of the contact person
Active From: Active From date can be entered
Active To: Active To date can be entered
Is Default: Select this option if the contact person is required to be set as default
2. Account Head Type 'General Ledger'
Account Head Address
Enter account head address details as discussed above
3. Account Head Type 'Cash'
Account Head Address
Enter account head address details as discussed above
4. Account Head Type 'Control Account'
Control Account Info

Classification: Select classification of the control account from drop down list
Free Sub Ledger: A control account which is by default become the parent ledger of any sub account head
Same As: If any parent account head (Normal type) is linked with same as option with another parent account head (supplier, customer or normal type) then the sub account heads of the parent ledger are also get tagged with the parent ledger selected in same as option.
Click 'Submit' button
5. Account Head Type 'Sub Ledger'
A. Parent Info
Control Account: Select the control account
Classification: the classification of control account will be populated
Is Parent Company: This is selected if this is a Parent Company
Parent Company: Search or enter name of the parent company
Is Consignee: This is selected if this is a Consignee
Sub-Contractor: This is selected if this is a Sub-Contractor
B. Account Head Address
Provide account head address details as discussed above
C. Bank Account Details
Provide bank account details as discussed above
D. TDS Info

PAN: Enter PAN
TDS Type: Three types of TDS available such as 'Deduction', 'No TDS' and 'TDS Applicable But Exempted'. Select as per requirement
i. Deduction
If 'TDS Type' is deduction then 'Company Type' should be selected
Company Type: Select Company or Other Than Company whichever is applicable
ii. No TDS

TDS Type 'No TDS' is to be selected.
iii. TDS Applicable But Exempted
If TDS Type is 'TDS Applicable But Exempted' then 'Company Type' should be selected

E. TDS Ledger Tag
Select TDS Ledger
Discontinue option for TDS Ledger Tag
User can discontinue the TDS Ledger while Editing account head master.
At First user has to create a ledger with TDS Ledger Tagging, after that transaction has been done for that particular Ledger. If user wants to discontinue the previous nature of that particular Ledger
Step1: Go to Setup > Ledger > Account Head Master
Step2: Go to Advance Search > Find the ledger
Step3: Go to tool tip > click on Edit option
Step4: Go to TDS Ledger Tagging TAB
Step5: Click on the check box of Existing Nature
Step6: Two options will be available from there
Step7: Then Click on Discontinue > Check box will be dimmed
Step8: Then Click on Submit button
Now the discontinued natures will not appear for the new entry, but those natures will appear for previous entry.
If user wants to delete the nature
Step9: Go to Finance Module > Setup > Ledger > Account Head Master
Step10: Go to Advance Search > Find the ledger
Step11: Go to tool tip > Click on Edit option
Step12: Go to TDS Ledger Tagging TAB
Step13: Click on the check box of Existing Nature
Step14: Two options will be available from there
(If there haven’t done any transaction for that particular ledger)
Step15: Then Click on delete > Check box will be un-tick
Step16: Then Click on Submit button
Deleted nature will not be appearing for the entry.
F. GSTIN Info

Click '+Add New Row'
State Name: Select name of the state
Party Type: Select party type. The options are Unregistered, Registered, Dealer Under Composition Scheme and SEZ
Address: Put address of the party (Optional)
Effective From: Enter the effective from date
GSTIN: Enter GSTIN except for Unregistered Party
6. Account Head Type 'Parent Company'
Account Head Address
Enter account head address details as discussed above
Preference based Account Head Master and Template Wise Group Tagging for all Template Masters
How to activate and use Preference based Account Head
Generally one time changes required for Account Head Master (those not using this preference also)
1. Go to Administration Home page
2. Go to API Integration > Sync
3. Click on Proceed to Sync
Activation of Preference based Account Head Master Template Wise Group Tagging for all Template Master
1. Go to Administration Home page
2. Go to API Integration > Sync
3. Click on Proceed to Sync
4. Contact support after that for activation of Account Head Master Template Wise for all Template Master
5. Wait for confirmation from Support side
How to use Account Head Master with multiple template masters
1. Go to Finance Home page
2. Go to Setup > Ledger > Template Master
3. Check that multiple template master is created
Sample of Multiple Template Master is created
1. Go to Setup > Ledger > Group Master
2. Check that Group Master is created for all the above template masters
3. Select all the Template Wise Group Tag for the Account Head Master
Sample of all Template Master is required

Note: In case of Sub Ledger, Template Wise Group Tagging needs to be in Control Account.
![]() Tutorial: Creating Supplier
Sub Ledger
Tutorial: Creating Supplier
Sub Ledger
![]() Tutorial: Creating Account Head Master
Tutorial: Creating Account Head Master
© Gamut Infosystems Limited