![]() Tutorial: Creating Group Master
Tutorial: Creating Group Master
Group Master
The ‘Account Group Master’ allows to arrange account heads under several account groups. It lists four primary account groups described as – Equity and Liabilities, Assets, Revenue and then Expenses – are by default and fixed. However, further grouping of accounts can also be made to create a tree structure under the primary account groups.
Template: Select any pre-built template
COA (Chart of Accounts): Select chart of accounts where groups of account heads are structured in form of a tree. Each parent group can further be sub divided into more than one sub-groups.
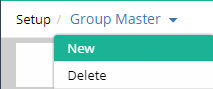
In the upper part of the window there are ‘Group Master’ drop-down menu including ‘New (Add Group)’ and ‘Delete (Delete Group)’. They are used to make an addition of new account group (Add Group) and delete a group from the Chart of accounts (Delete Group).
The upper left hand side of the window displays the names of account heads.
Description
Clicking on any account group will display its description in right panel
Add Group
To
add a new group, click ‘Group Master’ drop down menu and then click ‘New’.
A small dialogue box named ‘Add Group’ will appear on the screen where
you need to select parent group and then specify the name of the account
group in ‘Enter Group Description’ textbox.
Select
the parent group. The new account group will come under this Account Group.
Finally, click ‘Save’ button to add the new account group under the selected parent account group.
After successful creation of the group, the following message will be evoked and under the parent group the new group will be visible.
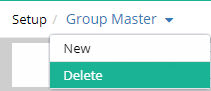
Delete Group
To delete a group, click ‘Group Master’ drop down menu and then click ‘Delete’ to delete an account group. A new window named ‘Delete Group’ opens. To delete an account group, first, select the particular account group and then click ‘Save’ button. It is to be noted that if an account group already contains account head(s), that group cannot be deleted.
Filter Options

1. Update Group
Click on the Update Group option
The grid will open with all Account Heads and Groups
Click on the grid which needs to be updated.
Now the pop up will open for ‘Update Group’ .
Here choose the Schedule for the group and click on "Update".
2. Rename Group
Click on the Rename Group option. In Rename Group pop up select the group which needs to be renamed.
Click on ‘Rename’ after changing the group name in Rename Group text field.
Restriction on Group Master Rename
System Generated Group Name cannot be changed
3. Transfer Head
The ‘Transfer Head’ allows transferring ledgers from one group to another group
This menu can be seen under Group Master Menu.
After clicking on the Transfer Head, Groups will be shown. Click on the group from which ledger needs to be transferred
After that choose the ledger, which needs to be transferred. Click Save.
A popup window will open. Select the group where ledger will be transferred. Click Save.
4. Mapping Account Head
The ‘Mapping Account Head’ is used to tag ledgers with new/existing template master.
After clicking on the Mapping Account Head, ledger will be shown which is to be tagged for default template (if any). Select the Template and corresponding COA for which mapping will be done.
Click on the ledger grid which needs to be mapped. A popup window will open. Here group needs to be selected. After selection click Save.
5. Transfer Sub Group
User can transfer a sub group from one group to another group. User Can transfer the Sub Group when Ledger exists in Source Group but not in Target Group.
Note: Only leaf groups (I.E. last level group) can be transferred
![]() Tutorial:
Creating Group Master
Tutorial:
Creating Group Master
© Gamut Infosystems Limited