After initial booking, changes may be required in terms of area, charge, unit, name etc. This interface is used for such amendments or changes in booking.
Business Unit: Select the concerned business unit
Financial Year: It gets populated, however user can select another as per requirement
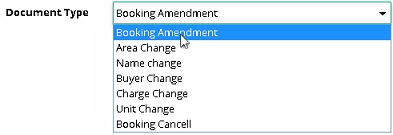
Document Type: It gets populated, however user can select another as per requirement
Document Date: It shows as on date by default. User can set another date.
Document No: It is generated after the entry saved
Booking No: Select the booking number. (Data comes from Transaction > Booking > Booking)
Project Hierarchy: project hierarchy gets populated after selection of booking number
Unit No: Unit number gets populated after selection of booking number
Applicant: The name of the applicant gets populated after selection of booking number
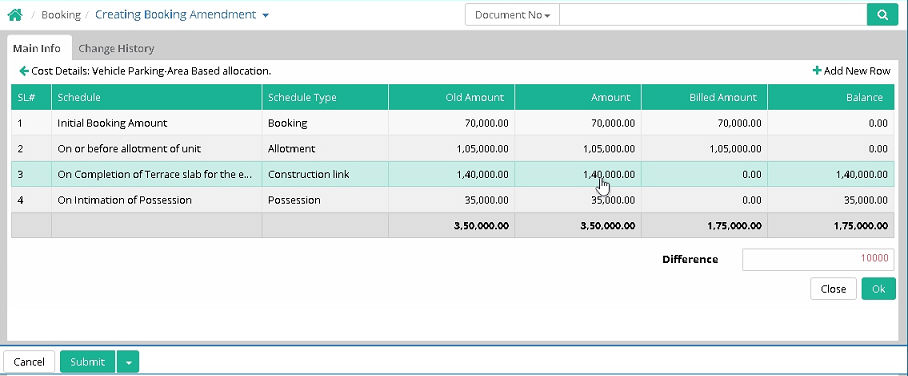
Clicking on the required revenue head, the cost details of the selected revenue head will open. For example, in the above screen user clicks on 'Unit Cost' row. The cost details section of the unit cost will open as shown in the picture below.
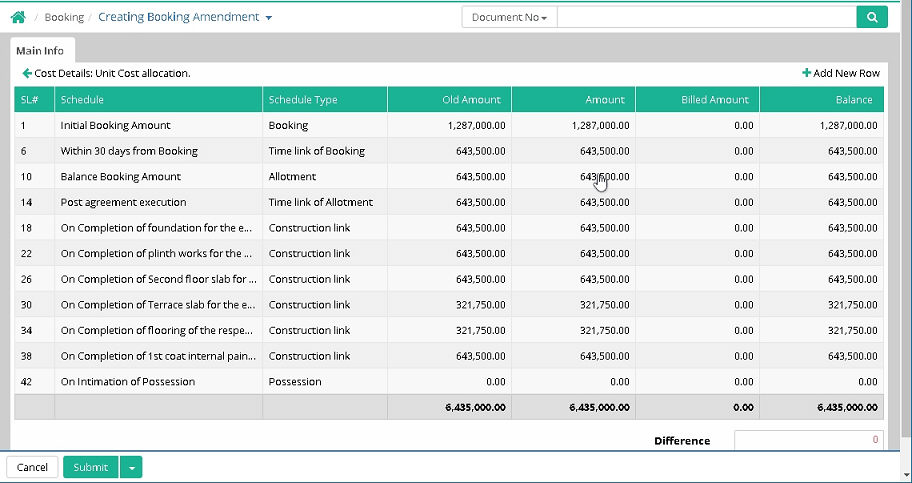
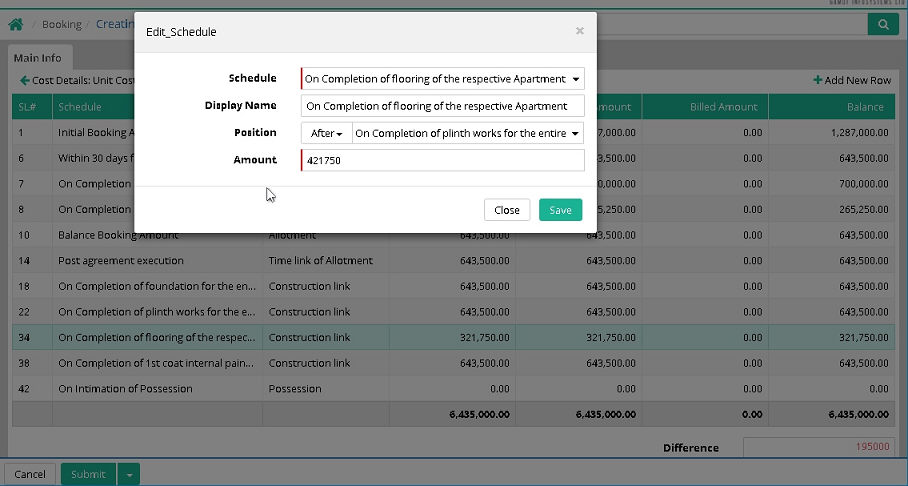
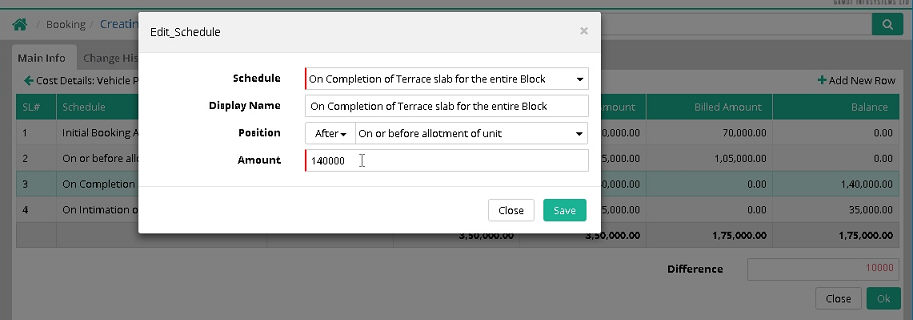
Click on the required schedule to edit. The 'Edit_Schedule' popup box will open. Here amount can be edited and saved.

Once the Booking Amendment entry got finally approved then only the “Is Amended” flag will be updated as YES in Booking Header.
The Booking amendment entry must be saved in provisional mode.
Different Document Types (View the reports of these amendments)
To change the area it is required to select 'Area Change' as document type
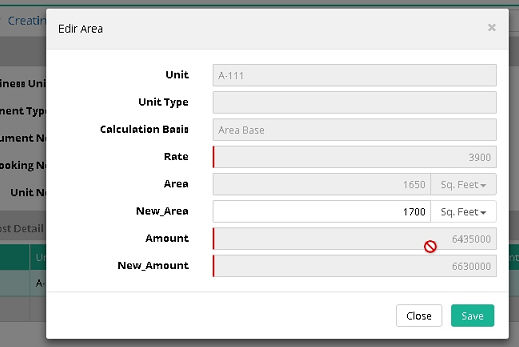
Click on the row under 'Area Info' to edit the area
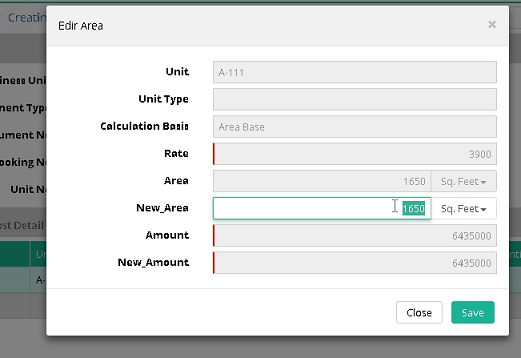
Enter the changed area in New_Area field and click 'Save'
Click on the row in 'Cost Detail' section to edit schedule
![]() Tutorial: Creating
Booking Amendment Area Change
Tutorial: Creating
Booking Amendment Area Change
To change the charge it is required to select 'Charge Change' as document type
Click on the row under 'Rate Info' to edit the rate
Click on the row in 'Cost Detail' section to edit schedule
![]() Tutorial: Creating
Booking Amendment Charge Change
Tutorial: Creating
Booking Amendment Charge Change
To change the name it is required to select 'Name Change' as document type.
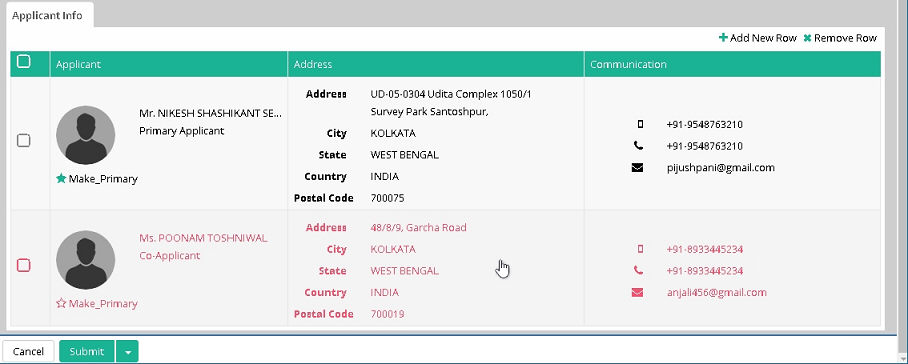
Select the booking number. Applicant and existing co-applicants details will populate in the grid. Select the co-applicants one by one and select display sequence numbers from 1-10 as per the requirement.

In case of adding a new co-applicant, click on "ADD New Row". Fill the applicant details manually or click on "Existing" checkbox to add an existing applicant. Select the display sequence numbers from 1-10 as per the requirement.
Add new applicant's name.

Select the old applicant name and click on 'Remove Row'
Notes:
In case of Primary Applicant Name change, the Primary Applicant Name and the Finance Ledger Description will be updated on the final approval of the Name Change entry.
Now system will update the Primary Applicant Name and the Finance Ledger Description on the final approval of the Name Change entry in case of Primary Applicant Name change.
Once the Name change entry got finally approved then only the Primary Applicant Name and the Finance Ledger Description will be updated in Booking Header and in Finance Account Head master respectively.
The Booking amendment entry (Name Change) must be saved in provisional mode.
![]() Tutorial: Creating
Booking Amendment Name Change
Tutorial: Creating
Booking Amendment Name Change
Once the Buyer change entry got finally approved then only the New Primary Applicant’s Name, New Application number, and the Finance Ledger Description will be updated in Booking Header and in Finance Account Head master respectively.
The Booking amendment entry (Buyer Change) must be saved in provisional mode.
Notes:
1. In case the Business Unit is having NET Posting methodology then Buyer Change entry will not be allowed
Now system will not allow making Buyer Change entry against the Booking if the that booking is belongs to the Business Unit which is having NET posting methodology.
Step1: Select the business unit which is having NET Posting methodology
Step2: Select financial Year, select Document Type as Buyer Change, select document date, and select the respective customer name
Step3: Select the “To Application Number”
Step4: Now click on SUBMIT button and check that system is not allowing to save the Buyer Change entry as this Business Unit is having NET posting methodology
2. System will restrict to deletion of any Buyer Transfer entry from Pending Approval
Step 1: Make one Buyer Transfer entry
Step 2: Log in with the approver’s login credential
Step 3: Now go to Pending Approval screen
Step 4: Now select the Buyer Transfer document
Step 5: Now click on Continue and then click on Delete Document option
Step 6: Now click on Submit
Step 7: Now check that system shows a Validation message and not allowing to delete the Buyer Transfer entry
To cancel the booking it is required to select 'Booking Cancel' as document type
In case of Booking Cancellation entry, “Is cancelled” flag will be updated in Booking Header, application cancelled flag and application.
cancelled date will be updated in application details header on final approval of the Booking Cancellation entry.
The Finance Ledger Description will also be updated with the text as "cancelled" on final approval of the Booking Cancellation entry.
Now system will update the “Is cancelled” flag in Booking Header, application cancelled flag and application cancelled date in application details header on final approval of the Booking Cancellation entry.
The Finance Ledger Description will also be updated with the text as "cancelled" on final approval of the Booking Cancellation entry.
Once the Booking Cancellation entry got finally approved then only the “Is cancelled” flag will be updated in Booking Header, application cancelled flag and application cancelled date will be updated in application details header.
The Finance Ledger Description will also be updated with the text as "cancelled" on final approval of the Booking Cancellation entry.
Note: The Remark field can be set as a mandatory field through Metadata.
Select the Reason created in Reason Master (Formula Based) against the Entry Type Booking Amendment and Document Type Booking Cancel.
Select the appropriate Reason and confirm that the system auto-populates/calculates the Cancellation Charge Amount based on the selected Reason.

Users will be able to see the “Brokerage Details” while making Booking Cancellation entry without tagging Note for Approval document.
Step 1: Go to Booking > Booking Amendment
Step 2: Select Business Unit, Financial Year, Document Date, Document Type as Booking Cancel, Customer Name.
Step 3: Now clicks on the “Detail” button and check.
Step 4: Here user will be able to view the “Outstanding Amount”, “LPF Amount”, “Total Amount of Outstanding and LPF Amount”, “Broker Name”, “Brokerage”, “Brokerage Bill Amount (Basic)”, “Non Reversible Tax” and “Loan Bank Name”.
Step 5: Now check that Broker Name, Brokerage amount, Brokerage Bill Amount (Basic) is showing under the Brokerage Details heading.
The Booking amendment entry (Booking Cancel) must be saved in provisional mode.
Now system will update the New Primary Unit No, New Primary Unit’s Project Hierarchy in Booking Header and the Finance Ledger Description in Finance Account Head on the final approval of the Unit Change entry.
Once the Unit Change entry got finally approved then only the New Primary Unit No., New Primary Unit’s Project Hierarchy and the Finance Ledger Description will be updated in Booking Header and in Finance Account Head master respectively.
Before Approval


After Approval


The Booking amendment entry (Unit Change) must be saved in provisional mode.
Notes:
1.
Users will be able to use the  button while making
Booking Cancellation entry without tagging Note
for Approval document.
button while making
Booking Cancellation entry without tagging Note
for Approval document.
Here user will be able to view the “Outstanding Amount”, “LPF Amount”, “Total Amount of Outstanding and LPF Amount”, “Brokerage Amount”, “Non Reversible Tax” and “Loan Bank Name”.
2. A new validation has been incorporated in Booking Cancel entry, if BRS against the Bank Receipts are not done then system will not allow saving the Booking Cancel entry.
Now system will validate the BRS against Bank Receipt while making Booking Cancel entry through Booking Amendment.
Step 1: Select Business Unit, Financial Year, Document Type-Booking Cancel, and Document Date. Select a Customer Name who is having few bank receipts without BRS.
Step 2: Now go to the Credit Note Tab and select all the invoices for Auto Credit Note entry.
Step 3: Now click on Submit
Step 4: Now check that system is not allowing to save this Booking Cancel entry and showing a validation message as “Booking Cancellation entry cannot be saved as BRS not found against some of receipts”
3. Attachment Delete option in Booking Amendment
Users will be able to delete attachment in Booking Amendment entry
Step1: Find any booking amendment entry which is having Attachment
Step2: Click on Delete Attachment, the attachment popup will open
Step3: Select the attachment which is required to delete and then just click on 'Remove Row' as shown below
© Gamut Infosystems Limited