Data import allows data to be imported from excel sheets instead of entering through the interface. Data has to be entered in pre-defined excel sheets, checked for correctness and is then imported into Farvision. Data import is available for many masters and a few transactions, the process of importing is the same. Only the excel template is different in which data has to be entered.
Data import is normally used by first time users of Farvision, or if there is a huge volume. Bulk data can be inserted into Farvision and it saves time. Once your backlog is cleared, it is recommended to use the interface for day to day entry. Sometimes data import is also used where the number of rows in a document is very large, example a journal voucher with 200 lines.
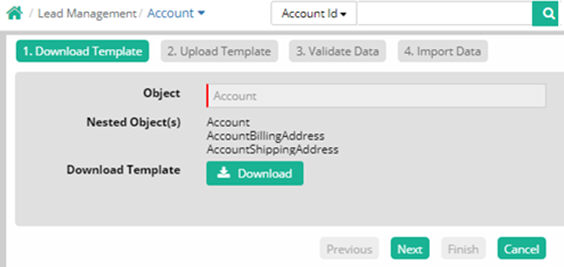
There are four steps to be followed

Object: This is the master or transaction form for which the excel template has to be downloaded.
Nested Objects: Some forms which have to be imported have a lot of data, and have multiple excel worksheets in one excel template. These multiple worksheets normally correspond to tabs of the entry interface. Example, Account Head Import will have the worksheets for Ledger, Ledger Address, Ledger Communication, Ledger Contact, Bank Details, etc.

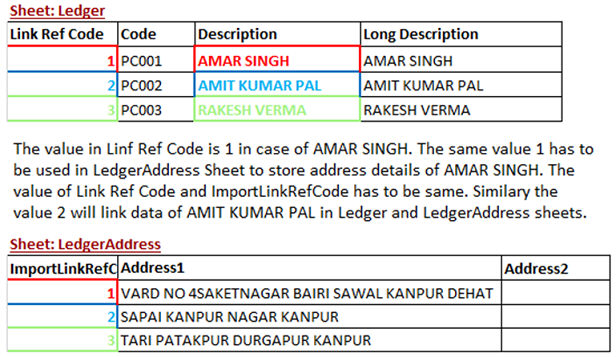
All these worksheets are linked to each other through a common field called Link Ref Code. The same value of this field in each row has to be entered under ImportLinkRefCode in the nested worksheets. In the Ledger worksheet Link Ref Code ‘1’ has details of Amar Singh, Link Ref Code ‘2’ has details of Amit Kumar Pal. In the Ledger Address worksheet, ImportLinkRefCode ‘1’ will contain address details of Amar Singh, Link Ref Code ‘2’ will contain address details of Amit Kumar Pal. The value given to the Link Ref Code and ImportLinkRefCode has to be the same so that data in the different worksheets can be associated with each other.
Download template : Download the template by clicking the Download button. An excel file will be downloaded on your local computer. Open the excel sheet. Enter the data in the excel sheet.
About the Excel Template
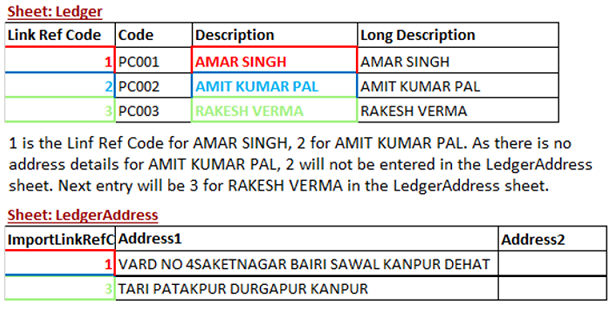
There may be one or more worksheets in which data has to or can be entered. Click on the different worksheets to enter data in them. Remember to use the same identifying value in all worksheets so that data between the different worksheets can be linked to each other. In case there is no data to be filled in the nested worksheets, leave it blank. Do not fill only the ImportLinkRefCode if no other data is available for entry in that sheet. In case there is a row in the main sheet but there is no associated data for that row in the linked sheets, skip that row number in the linked sheet.
Each excel template has an Info worksheet which will guide the user about the properties of the fields.
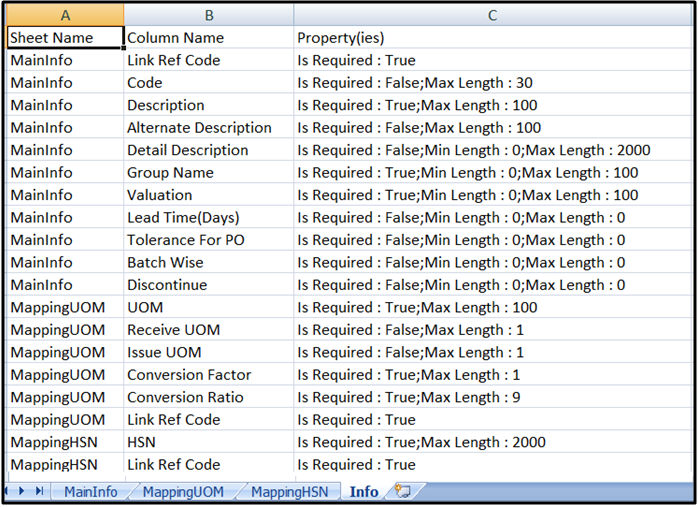
Sheet Name: Worksheet names are listed here.
Column Names: Fields available in all associated worksheets are listed here. Data has to be entered as rows, fields are the columns.
Properties: Fields can have the following properties
Is required: True - this is a mandatory field, has to be entered.
Is required: False - this is an optional field.
Max length: The maximum number of characters which can be entered in that field.
The following points have to be kept in mind while filling data in the prescribed excel sheet
Do not remove any columns or worksheets, even if there is no data to be entered in them. Format must be as per the original excel template downloaded.
Do not change any names, settings, alignment, formatting of fields, worksheet, or files.
Remove any hyperlinks from the data fields. Example Email.
Try to import records into batches of 100, 200 or 500 rows at a time. Import can be run multiple times. Data will keep on getting added in Farvision.
Fill all mandatory fields
Enter data in ImportLinkRefCode if data is there in the associated worksheets
Do not enter blank rows, especially at the end of the excel sheet
Wherever applicable, Debit and Credit amounts should tally.
Spelling of account heads, parent account, items, etc should be correct, i.e. match with the masters in Farvision
Wherever applicable, data in related sheets should tally with the data in the main sheet. Example, Receipt/Payment or Journals, the Adjustment Info amount for each party should tally with the amount in Ledger details for the same party.
Some tips
Clear cache and clear history of the browser, in case of unknown error
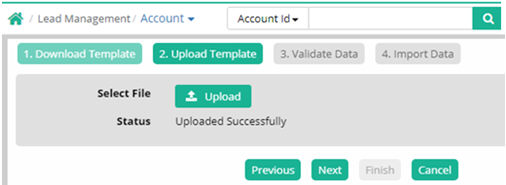
Upload the filled out excel Template to start the data uploading process.

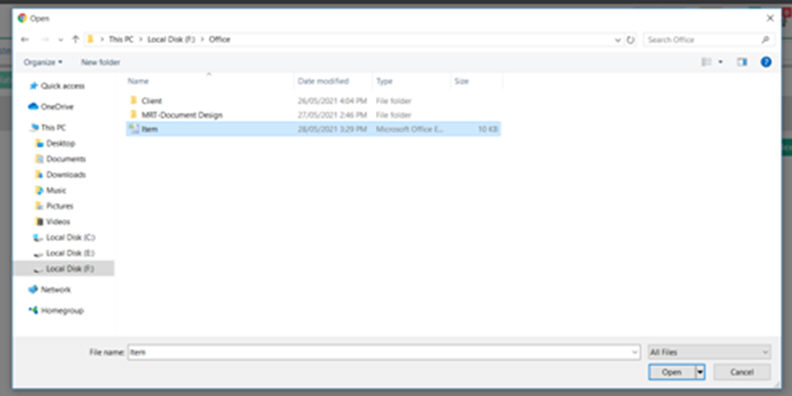
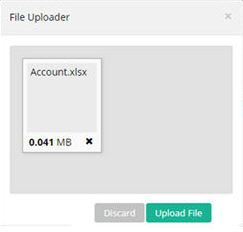
Select File: Select the file in which data has been entered and has to be uploaded.
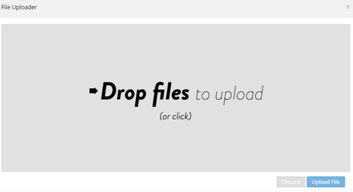
The template can be dragged and dropped or the same can be selected from its location. Click on the Drop files to upload panel.

Process Queue: Click on the box so that the validation process can be routed through the Queue Management console. If the data volume is large, it is important to queue this process else the server will become very slow.

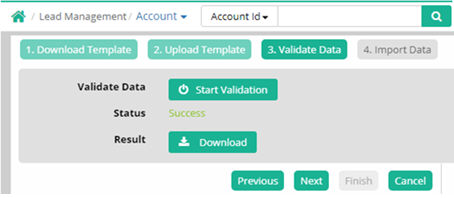
Validate Data: Click on the Start Validation button to start the validation process.
Status: While the data validation is ongoing, a status bar will show Validating Data, Please Wait. If the data validation is successful, it will show the status as Success. If data is not correct and has failed the validation process, it will show Error Found.
Result: In case the status is not successful, the reasons why validation has failed will be provided in this Excel file which can be downloaded. The file will have both data which has a problem and data which is correct.


In this example, Relationship should have Son or Wife, and the name Rakesh Kumar and Mahaveer Singh should have been entered in Relative Name respectively.

In this example, Postal code is a mandatory field that can’t be blank.
The validation routine has to be run repeatedly till there are no errors left.
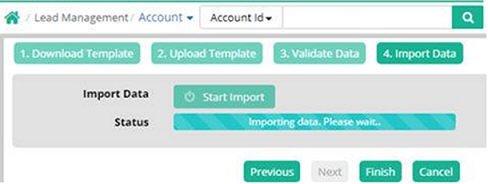
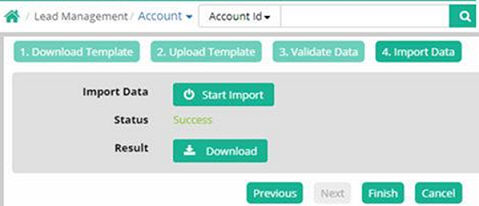
Click on the Next button to go to the Import Data tab.
© Gamut Infosystems Limited